Installation Tips for Your PS2 Mod Chip
Installing your PS2 mod chip is not like rocket science, but it can be intimidating for many. The only tools you will need are a screwdriver and a 15-watt soldering iron. Depending upon your experience with soldering irons, it could take you anywhere from 30 to 60 minutes.
|
There is no need to be intimidated by a PS2 mod chip installation. If you've never used a soldering iron before or if you have and were not that good at it, you should be able to get through the whole process within an hour tops. This includes taking apart your PS2 and putting it back together again. Soldering and wiring will take anywhere from 30 to 40 minutes and then you'll have your concole back up and gaming before you know it! Make sure you have all the right equipment for the job and take your time! |
Pre-Mods: Let the Pros Do ItInstalling PS2 mod chips really aren't that difficult. It does take some time and effort though. For those of you who may not want to perform digital surgery on your PS2's, you might want to consider buying a pre-modded PS2. Pre-modded systems come with the mod chip built in so you don't have to do it yourself. We found refurbished and brand new pre-modded systems at Modchipstore.com at some very good prices. PS2Cover.com also has great deals on Pre-Mods. |
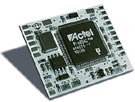
PS2 Mod Chip Install Tips
#1 Get the right soldering iron for the job. You will need a soldering iron rated at 15 watts, this provides just enough heat for the soldering job without actually hurting your console. Make sure you buy one with a small, fine tip. Using a fine tip will make it much easier to install the PS2 mod chip when you need to solder to the smaller sections of the motherboard. You can find a fine tip soldering iron between $15 - $20 at places like Radio Shack and WalMart.
#2 Use thin, 15 AWG Wrapping Wire. You should be able to find this at any Radio Shack Store. By using thin wiring, you will avoid mistakes when it comes to soldering. If you use wire that is too think, you'll have a heck of a time attaching it to the right places without the wire touching other parts of the main board. Having wrapping wire also helps because it is insulated and ensures you won't short out your main board.
#3 Use solder with Flux in it. Flux will help the solder melt and attach itself to both the wires you're using as well as the solder points. Don't make the mistake of buying the solder and flux separately. By doing that you risk using too much flux which could eat away at the solder point as time goes on. You'll then have to re-solder again later on.
#4 Keep your wires short. You are sending information from the mod chip, to your PS2 motherboard. The less of a distance the information has to travel, the better. Make sure your wires are as short as possible to avoid any problems.
#5 Take Your Time! Everyone is always in a rush and we hate waiting for anything, especially when we have games to play! You will find some of the solder points are small, requiring you to be precise. We said this wasn't rocket science and you certainly don't have to be an expert at soldering, but you do have to take your time to get it right. Double check every connection. Make sure the wires are attached correctly and most importantly, that the wires are attached only to the soldering points they should be, without touching any other wires.
#6 Get the right chip for your PS2 model number. There are many different versions of the PS2 Main Board, so you must get the right one for yours. To get a list of PS2 model numbers, just do a search on google. You will find numerous sites providing a listing of all PS2 model numbers. You do have another option here, you can go with a Universal PS2 Mod Chip. Using this chip will do away with having to find your model number because the universal chip will work in every single PS2 console currently on the market. If you want to go this route Modchip.com has more info and several universal chips available on their site.
